Showing posts with label Desserts. Show all posts

Wednesday, January 26, 2022

Apple Are You Kidding Cake


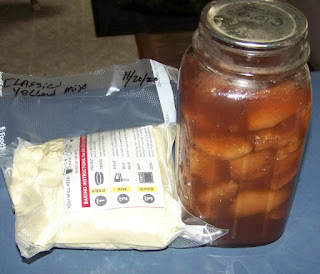
I love simple good tasting recipes that I can make with easily attainable shelf stable and inexpensive ingredients. Are you kidding cakes are recipes dating probably from the 80's and what people now call dump cakes. Usually made with a bought cake mix and a can of pie filling and 3 eggs. That's it!

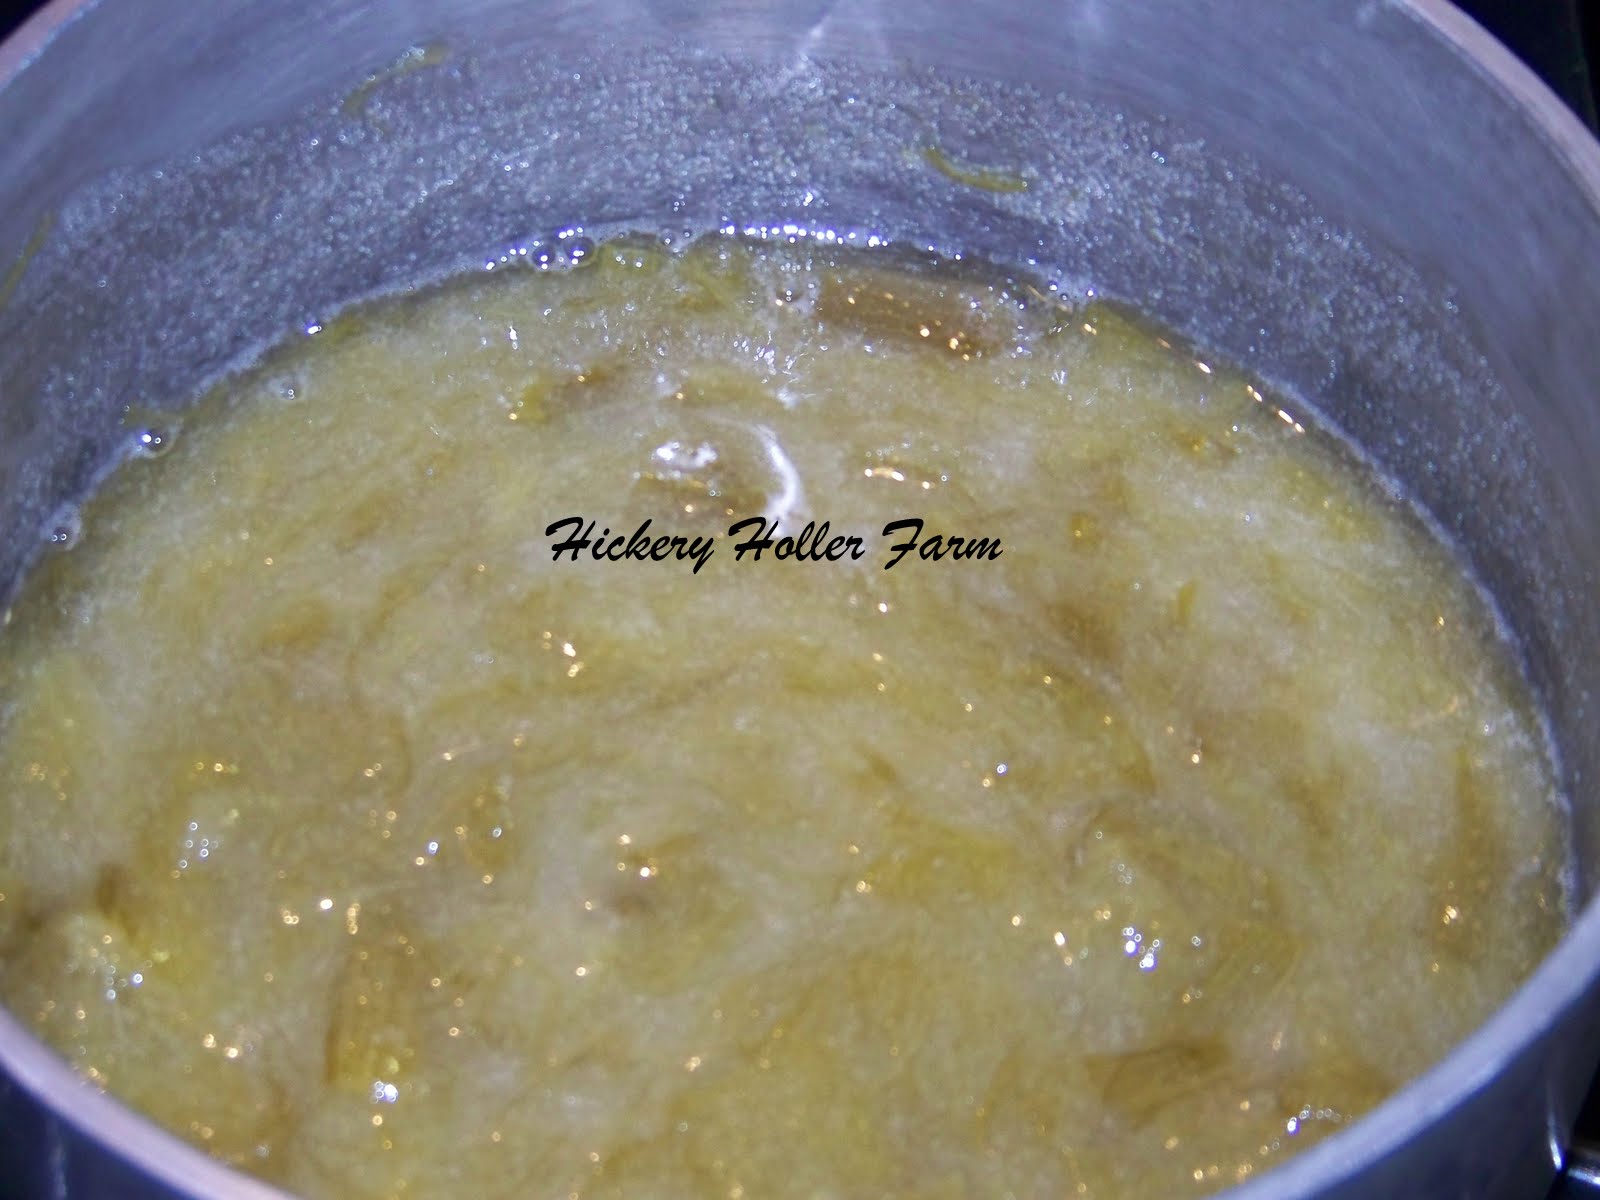
I grow lots of different fruits which means I always have pie fillings canned. So this is a simple cake for me. If I don't have the kind of fruit filling I want I can take frozen fruit and add sugar and corn starch and quickly make a filling on the stovetop. 

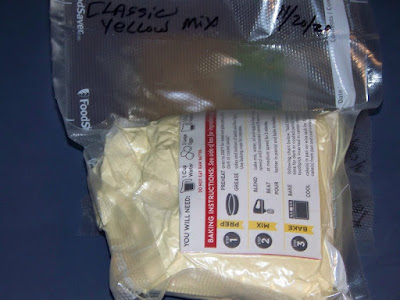
I buy cake mixes when they are on sale. They must be under $1.00. Many times I buy them when they are $.50 or less. Then I take them out of the boxes to prevent pantry bugs and repackage in vacuum seal bags. I simply make a cut in the mix bag for the excess air to escape, cut out the directions and place in bag and seal. I label type, date I bought and expiration date. The reason I keep expiration date is that if it is beyond expiration I add a teaspoon of baking powder to the mix. These I keep in a large 5 gallon bucket with a gamma lid to keep out any bugs again or mice. 


For this one I simply used a plain yellow cake mix and an apple pie filling. I added the pie filling to the cake mix and 3 duck eggs slightly beaten and stir well to moisten. I added a touch of apple pie spice out of the cabinet and a teaspoon of vanilla. My favorite mix to add to apple pie filling is butter pecan cake mix when I can find it. 

You can add walnuts or pecans if you like. I also sometimes chunk up some cream cheese and shove the chunks down in the prepared batter before I put it in the oven.


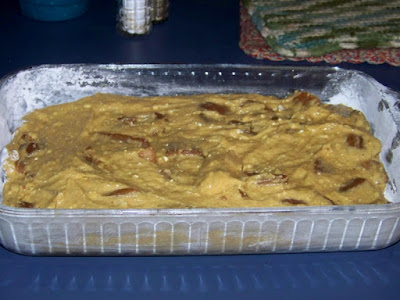
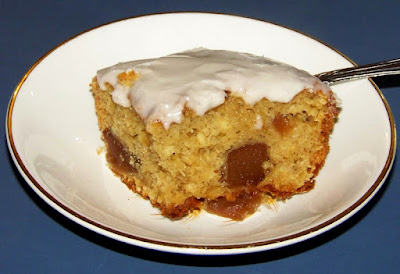
I add that to a greased 9 X 13 pan and put in a 350 degree preheated oven for about 35 minutes in my oven. 


Then to 3 cups of powdered sugar I added evaporated milk a tablespoon at a time until it was the consistency to spread as a light icing. Added a couple drops of vanilla also. Spread this on the cooled cake. 

And there ya go. An easy inexpensive moist dessert great for  a snack for the grandkids or a sliver to go with a cup of afternoon hot tea. And the sky is the limit. My favorite is chocolate cake with cherry pie filling and add white chocolate chips. I add chocolate icing with a whole cherries on top of each piece. Or add a chocolate kiss on each piece.  I make these lots when my husband has to have desserts for his American Legion supper meetings. Another good one is blueberry pie filling and lemon cake. Add  lemon icing and slivered almonds. 

Watch for those cake mix sales and stock up on a few. 

Blessings from The Holler

The Canned Quilter

***************************************************

I can also be found at

Friday, February 14, 2014

Lemon Snack Cake


Happy Valentines Day!

In honor of the holiday I thought I would post a little recipe for you. We all know how I love my little 8" snack cakes. Enough to give everybody a little taste yet not a huge cake laying around to tempt those with little will power.


Lemon Snack Cake

1 1/4 cups all purpose flour
1 cup sugar
1/2 teaspoons baking powder
1/2 teaspoon salt
1 egg
2 teaspoons lemon zest
1/4 cup butter or margarine melted
3/4 cup milk


Lightly grease 8 inch square baking pan
Preheat oven to 350. 
Combine flour sugar baking powder and salt in a bowl.
In another small bowl combine egg and lemon zest and beat well. 
Add melted butter and milk and mix all well. Combine with dry ingredients and stir well. Some lumps will remain.
Bake 35 minutes or until toothpick inserted in center comes out clean
Cool completely...

Icing

For my icing I simply softened half a stick of butter and then added 2 teaspoons lemon juice and powdered sugar gradually with a fork beating as I go until I had a thick spreading consistency. Spread on cool cake. I refrigerate any leftovers. 

Blessings from The Holler

The Canned Quilter

Monday, October 28, 2013

Plain Old Gingerbread


Before the days of easily finding granulated sugar there was molasses, I even have recipes for popcorn balls for Halloween made from molasses. Nothing says home on a frosty autumn morning like warm gingerbread. To quote my grandson Hank " Got cake grandma? You should! " A sliver of this soft and moist gingerbread and a tall glass of ice cold milk makes me immediately think of my own grandmother who made gingerbread often for her grandchildren. This stuff is moist and keeps forever making it the perfect treat, grandchildren or not.

The ingredients are things often produced on the farm and found in the farm cupboard. 

Simple and good can't be beat.     


Gingerbread

2 cups all purpose flour
2 teaspoons ground ginger
1 teaspoon baking soda
3/4 teaspoon cinnamon
1/2 teaspoon ground nutmeg
1/2 teaspoon salt
1 stick (1/2 cup) unsalted butter, softened
3/4 cup packed brown sugar
2 large eggs
1/2 cup mild molasses
3/4 cup well shaken buttermilk
1/2 cup hot water

Preheat oven to 350 and place rack in middle of oven. Butter a 9 inch baking pan.

Whisk together flour, ginger, baking soda, cinnamon, nutmeg and salt in a bowl.

Beat butter and brown sugar at medium speed until fluffy

Beat in eggs until blended.

Beat in molasses and buttermilk.

Mix flour mixture in gradually on low speed until smooth

Add hot water and beat 1 minute only!

Spread batter evenly in pan and bake 45 minutes or until wooden pick inserted into center comes out clean. 

Cool and serve.

Note***I sprinkle powdered sugar lightly over my gingerbread and serve***


Blessings from The Holler

The Canned Quilter


Friday, September 20, 2013

Autumn Surprise Cake


As the seasons change so does the fare on a homestead table. We have eaten a steady diet of cucumbers, watermelon, cantaloupe, and tomatoes  for weeks knowing that it will soon be gone. As we welcome in Fall we welcome in a new group of foods. Pears, apples, pumpkins, sweet potatoes and winter squash.  

For us here in the Holler the first of the apples are ripening and the first dish I made was this cake. I love these kinds of cakes. Most people call them snack cakes. Made in an 8 inch square pan or even a skillet this cakes is small enough to give everyone a taste for a day or two without having huge amounts of cake leftover. 

Great with morning coffee, or with a glass of milk as an afternoon snack and equally as good as a small dessert.  Versatile, moist and delicious this  old recipe has been a keeper for a long time in my family. 


Autumn Surprise Cake

2 cups chopped, unpeeled apples                      1/2 cup cooking oil
1 cup white sugar                                                1 egg beaten
1 1/2 cups sifted all purpose flour                      1 tsp vanilla
1/2 tsp salt                                                           1/2 cup chopped nuts       
1 tsp baking soda                                                1/2 cup flaked coconut
2 tsp cinnamon

Mix apples and sugar in mixing bowl.
Let stand for 20 minutes until a juice starts to form.
Sift flour, soda and salt together
Add to Apples!
Add remaining ingredients and mix thoroughly.
Pour into greased and floured 8 inch square baking pan
Bake in 350 degree oven approximately 50 minutes.
Remove from oven and let cool
I frost mine with about 1/2 cup powdered sugar and 1 Tbsp milk mixed together and then drizzled over cool cake. You can also just sprinkle powdered sugar over top. 

Tips** this dough will be very stiff and thick. I substituted 1/2 cup raisins for the nuts**


On a personal note today is my birthday and I am so glad you are all sharing it with me!


Blessings from The Holler

The Canned Quilter

Tuesday, September 10, 2013

Chocolate Cake


As you know Baby O just celebrated a birthday. Per our family custom the birthday girl got her choice of birthday meals. Baby O is known for her simplicity and requested grilled cheeseburgers, homemade buns, oven fries and chocolate cake. But not just any chocolate cake but THIS chocolate cake.   I found this recipe about 20 years ago in an old cookbook and it has been a tried and true keeper in our household.  If you are looking for a plain chocolate layer cake, moist and decadent then this is the cake for you.  


Chocolate Layer Cake

1 cup butter or margarine softened
3 cups packed brown sugar
4 eggs
2 teaspoons vanilla extract
2 2/3 cup all purpose flour
3/4 cup baking cocoa
1 tablespoon baking soda
1/2 teaspoon salt
1 1/3 cups sour cream
1 1/3 cups boiling water

Preheat oven to 350
Grease and flour 3 nine inch cake pans
In a mixing bowl cream butter and brown sugar
Add eggs one at a time, beating well after each addition
Beat on high speed until light and fluffy
Blend in vanilla

Combine ( I sift) flour, cocoa, baking soda and salt in separate bowl. 
Add to the creamed mixture alternately with the sour cream. 
Beat on low just until combined. 
Stir in boiling water ( I do it by hand)
Pour into your greased and floured 9 inch cake pans
Bake for 35 minutes or until toothpick inserted comes out clean. 
Cool for ten minutes then remove to wire racks to cool completely.


Chocolate Sour Cream Frosting

1/2 cup butter or margarine
3 squares (1 ounce each) unsweetened chocolate
3 squares (1 ounce each) semisweet chocolate
5 cups confectioners sugar
1 cup ( 8 ounces) sour cream
2 teaspoons vanilla extract


in a medium saucepan ( or double boiler) melt butter and chocolate over low heat. Cool 5 minutes. In a mixing bowl combine sugar, sour cream and vanilla.  Add chocolate mixture and beat until smooth. Store frosted cake in refrigerator. 

Suggestions***** try putting cherry/raspberry preserves, jam, or chopped chocolate covered cherries candy between the layers.


Blessings from The Holler

The Canned Quilter


Friday, July 12, 2013

Blackberry Snack Cake


This recipe was clipped from a magazine years ago. It was originally for Blackberry Bread. I usually just make it in a skillet or small 8 X 8 baking dish. It is great alone or with just a sprinkling of powdered sugar over it. On this day Baby O was in the mood for icing. 
 
Blackberry Snack Cake

1 1/2 cups all-purpose flour
1 teaspoon salt
1 teaspoon baking powder
1/8 teaspoon ground cinnamon
1 1/2 cups fresh or frozen blackberries
1 cup sugar
1/2 cup milk
1/3 cup butter, melted
2 large eggs
1 teaspoon lemon zest
2 tablespoons lemon juice
 
Preparation
1. Preheat oven to 350 degrees. Stir together flour, salt baking powder and cinnamon.Now stir in Blackberries enough to coat berries in flour mixture. 

2. Whisk together sugar and next 5 ingredients in a medium bowl until thoroughly blended. Add to flour mixture, stirring just until blended. Pour batter into a lightly greased 8 1/2- x 4 1/2-inch loaf pan.

***I use an 8 X 8 baking dish and have even used a well greased skillet*** 
  
3. Bake at 350 degrees for 1 hour and 15 minutes or until a wooden pick inserted in center comes out clean. Cool in pan on a wire rack 10 minutes. Remove from pan to wire rack, and cool completely (about 1 hour).

*****I do not remove from pan but rather serve it as a snack cake!!*******


Icing

On this day we wanted icing so I took half a small block of cream cheese and brought to room temperature. I put the softened cream cheese in the bowl of my mixer and added about 2 tablespoons blackberries. Turn on the mixer and mix slowly the blackberries and cream cheese. Then I added a couple drops lemon juice.  Now with mixer going on slow I added powdered sugar about 1/4 cup at a time to the mixing bowl with the beaters running until it reached the consistency of icing.


 Baby O and I are loving this color!


Now spread on cooled cake.


 Just a small cake with a little berry/lemon/cream cheese zing. Perfect for some summer snacking!

 Blessings from The Holler

The Canned Quilter

Monday, May 27, 2013

Impossible Pie

 
Right now I have lots of eggs in my refrigerator! Lately I have seen several different postings and recipes for this pie. It uses lots of eggs, makes it's own crust and to me tastes similar to a coconut custard only a little denser.  This recipe has been out there for a long time and when I ran across it I thought I would take advantage of all those eggs. We were not disappointed. I'll post a link to the Granny Miller site where you can find the recipe. There is also a Youtube video on katzcradul's youtube channel with the recipe. 

Granny Miller's Impossible Pie

IMPOSSIBLE PIE RECIPE
  • Preheat oven to 350°F
  • In a large bowl combine
4 eggs
2 cups of whole milk
1 cup of white sugar
1/2 cup flour
1/2 cup of melted butter
2 teaspoons of vanilla
1 cup shredded coconut
  • Mix well with a hand beater or electric mixer.
  • Pour the liquid mixture into a buttered 10” or larger pie plate or casserole dish and bake for about 45 minutes or until a knife comes clean when inserted into the center.Don’t try to use a smaller pie plate or dish with this recipe, because you’ll be sorry when you’re cleaning the bottom of your oven floor. The “pie” will puff up while it is baking and if the plate isn’t large enough it will spill over the sides.
Remove the pie when done and allow it to cool. I think Impossible Pie tastes best after it has been refrigerated.


So if you have lots of eggs give it a try and see what you think! Some of you younger cooks out there give it a try. I love the way these older recipes come full circle again and again. 

Blessings from The Holler

The Canned Quilter

Wednesday, April 24, 2013

Rhubarb Pie From Canned Rhubarb


Curious In The Kitchen left a comment back on the 27th of March asking how to make rhubarb pie from canned rhubarb. 

Rhubarb Pie

4 1/2 cups of canned drained fruit
1/4 cup water
1 1/2 cups sugar
pinch of salt
3 Tablespoons Tapioca
1 tsp vinegar
Crust

Preheat oven to 400.
Prepare pie crust


Drain rhubarb well in a strainer retaining juice. I used for my pie 1 quart canned rhubarb and I took out a small container strawberries. Thaw and drain strawberries well. This pie will call for more than a quart of drained fruit instead of opening another jar of berries I simply added strawberries.  You can also make your pie with rhubarb exclusively.  


Your canned rhubarb will not be firm but I take a spoon and push on the rhubarb to get out as much liquid as possible. 


To a saucepan add 1 cup of your rhubarb. The recipe calls for adding 1/4 cup water. I added 1/4 cup retained rhubarb juice to pot. Now add 1 1/2 cups sugar, pinch of salt, 3 tablespoons tapioca. Now bring pot to a simmer and cook for about 5 minutes to melt sugar completely and cook tapioca. Add 1 teaspoon vinegar. 


Now add additional approximate 3 cups of fruit to a large mixing bowl. I added the rest of my canned rhubarb and small container of strawberries well drained.  


To that bowl add your cooked sugar, tapioca, rhubarb mixture and stir all well.  


Spoon into a prepared crust. You can find a tutorial for my pie crust HERE
This crust was made using my rendered lard from the last pig we butchered. 


Now place your top crust over the filling. 


Seal and crimp edges


I then brush my pies with a tablespoon milk and a beaten egg to help them brown


Bake in preheated 400 degree oven until crust is browned and filling is hot and bubbly. Mine took 1 hour and 15 minutes. Cool completely before cutting. 

Hope this helps those of you looking for a way to use that canned rhubarb. My neighbor says that her mother used to thicken her canned rhubarb by cooking it with sugar and corn starch and serve it over ice cream as a syrup. 


Blessings from The Holler

The Canned Quilter


Friday, March 22, 2013

Zucchini Pineapple Cake


Around my house at the least once a week my family starts looking for something home baked. Pie, cake, or cookies it really doesn't matter just a little sweet treat. They will eat on it all week but if I don't bake something they tend to stray to the chip aisle of the local convenience store !! They don't eat much at the time but they are really spoiled to those baked goods. 


One of my most read canning recipes was the post I did on canning zucchini that tastes like pineapple. For those years that you have zucchini coming out of your ears this is a great way to use it. O Wise one eats it over cottage cheese and I like to bake with it. I have found that you can use it in any recipe that calls for canned pineapple.   


I have a simple cake that I like to make with my pints of pineapple zucchini. It only has 4 ingredients. 1 box yellow or butter cake mix, 3 eggs, 1 pint of pineapple zucchini and 1/2 cup oil or melted butter. First preheat your oven to 350 and generously butter a 13 X 9 X 2 baking dish.  


Beat the 3 eggs


Then I sift in my cake mix. Then add the entire pint of zucchini pineapple with juice. (I reserve about 2 tablespoons of pineapple juice for the icing) Then add the oil or butter. Stir well after each addition. Pour into your buttered dish and bake in that 350 degree preheated oven until it tests done. 


Remove from oven and allow to cool completely. 


For the icing I softened 1 stick of butter and put it in my mixer then added powdered sugar and the reserved pineapple juice alternately until it was the consistency of icing and spreadable. You could also use pineapple flavoring. Then I sprinkle a hand full of coconut over the top. 


What more could you ask for? A moist simple cake with few ingredients. Made with zucchini canned from my garden and eggs from the hen house. You can even substitute the cake mix  for a homemade cake mix. I have sprinkle nuts over the top also. It is also great with toasted almonds.   


The perfect cake to sit down and enjoy with a cup of coffee with the neighbor, a quick pot luck dessert and great afternoon snack for a hungry teenager with a cold glass of milk.  

And even better another recipe to use what we grow here on the farm and can and eliminating buying canned pineapple. Now if I could just figure out how to grow coconuts this far north I would be set. 

Blessings from The Holler

The Canned Quilter


Saturday, February 23, 2013

Sweet Potato Cake


If you are a regular reader here you know that I had  bumper sweet potato harvest last year. I've canned sweet potatoes and given away sweet potatoes yet still have lots. 


My mother had this great sweet potato cake recipe that she cut from a magazine back in the 70's I think. Over the years she made a few adjustments such as adding buttermilk for the liquid. She made it her own. The only problem was that this rascal takes 7 eggs. With lots of dark and dreary winter days eggs were somewhat a premium in my larder. Thank goodness I had some frozen in the freezer to get me through. But eggs are an issue no more as the ladies have come through for me in true Hickery Holler form. I am virtually swimming in eggs. So with 6 dozen eggs in the fridge I splurged and made this cake. 


Sweet Potato Cake


1 1/2 cups cooking oil
2 cups sugar
4 eggs separated
1/2 cup buttermilk
2 1/2 cups sifted flour
3 teaspoons baking powder
1/4 teaspoon salt
1 tsp cinnamon
1 tsp nutmeg
1/2 cups grated raw sweet potato
1 cup chopped nuts
1 tsp vanilla


  • Preheat oven to 350.
  • Grease and flour 3 8 inch cake pans.
  • Combine cooking oil and sugar and beat until smooth.
  • Separate eggs and add egg yolks only one at a time to oil and sugar and beat well then add buttermilk. Set whites aside.
  • Sift flour then measure. Now sift together sifted flour, salt, baking powder, cinnamon and nutmeg.
  • Now remove bowl from mixer and add the dry ingredients and mix well by hand. 
  • Add grated sweet potatoes, nuts, and vanilla and mix well.
  • Beat the 4 remaining egg whites until stiff and fold gently into cake mixture. 
  • Distribute batter evenly between the 3 greased and floured cake pans.   
  • Bake for 25 to 30 minutes or until it tests done. 
  • Cool for about 10 minutes then remove from pans to rack to finish cooling.

Frosting

1 large can evaporated milk
1 cup sugar
1 stick oleo (margarine)
1 tsp vanilla
1 1/2 cups flaked coconut
3 egg yolks

Combine milk, sugar, oleo, egg yolks only in saucepan. Cook over medium heat about 12 minutes or until mixture thickens stirring constantly. Remove from heat and add coconut and vanilla, beat until cool and of spreading consistency. Spread on cooled cake. 


Blessings from The Holler 

The Canned Quilter


The Chicken Chick


Related Posts with Thumbnails