Showing posts with label Vegetable and Side Dishes. Show all posts

Thursday, June 23, 2022

Freezing Twice Baked Potatoes


Temperatures are heating up here and I hate to turn on the oven and heat up the house. Now is the time of year that I get busy gardening and canning and such so this is the time of year that I like to premake food to save time. I use my crockpot lots, grill outdoors, eat lots of salads and premake meals. I dug about 8 pounds of potatoes and made twice baked potatoes to freeze. 

It was a rather simple process. I simply rubbed my cleaned potatoes with olive oil and coarse salt.  Then I baked them for about an hour and fifteen minutes at 350 or until soft. Then I allowed to cool for about a half hour and then split and spooned out the insides and mashed. 


To the mashed insides of the potatoes I added sour cream, chives, bacon bits, cheese, salt and pepper. Then I took the mashed potato insides and spooned back into the shells and then sprinkled with cheese and bacon bits and froze on baking sheets.  


Once frozen I removed them from the baking sheets and wrapped the individual halves in aluminum foil and added them back to the freezer. I take them out in the mornings that I want to eat them and unwrap and defrost to cook in the oven, in the microwave or on the grill. A great addition to a summer salad and grilled vegetables fresh from the garden. I find they are good for about 3 months in the freezer just wrapped in foil. 

Blessings from The Holler

The Canned Quilter

*************************************************

Friday, June 26, 2020

Cabbage to Slaw


Remember the huge cabbage I showed you awhile back. We had a small dry spell without rain for about 3 weeks. Last week we got 3 inches. Know what happens when cabbage goes through a dry spell and then gets a huge rain. The plant takes up moisture faster then the head can grow to accommodate it. Tomatoes do the same thing. They crack and once they crack they rot. Knowing that the rain was coming we knew the ripe heads of cabbage had to be picked before the rain. I pick tomatoes before big rains if possible and let them finish ripening inside. Mother nature can be such a fickle gardening partner. 


I knew I wanted to make freezer slaw with this cabbage. You can find the recipes in my canning recipes. Above the shredded vegetables are sprinkled with salt and allowed to sit and the salt to draw out excess moisture. This slaw is like traditional slaw with onions and carrots shredded with the cabbage and the addition of green peppers also. Then instead of a mayonnaise dressing base you make a dressing from vinegar, sugar, dry ground mustard and whole celery seeds. The dressing is heated and then poured over the shredded vegetables. 


Above the vegetables after soaking in salt are drained of moisture and rinsed in a large colander.Once drained the HOT dressing is poured over the slaw and allowed to sit a little bit. Then I put the slaw in freezer containers and freeze. This slaw will keep what seems like forever in the fridge due to that vinegar. It will freeze for a good 6 months or more. While it is not super crunchy it retains enough crunch to still be really good. It is a way to freeze a salad for later. You just take it out and let thaw in the fridge. This is an original Ball Book recipe but my husband's grandmother made one at the turn of the century almost identical. . 


Remember the post I did 2 weeks ago about processing the turkeys I caught on sale. While I was canning I cooked down the bones from that turkey and now have 10 quarts of canned turkey broth. I use it the same as chicken broth in cooking and soups. 

I also froze 6 containers of freezer slaw to munch on in the months to come. I still have 2 separate crops of cabbage out there not ready yet. One I will put in the freezer to go into soups and such and the youngest plants, still small will be my fall crop and will become my winter sauerkraut. Especially since I have 3 half gallons of kraut in the fridge now that we are eating on. 


By planting my cabbage at 3 different successive times I can insure I have cabbage to eat year round in several different forms. Frozen in both slaw and for soups and fermented into sauerkraut that we usually eat as meals with sausage. We also enjoy fresh cabbage throughout the season. It's great smothered down in a big ol black skillet with some onions and bacon. Perhaps our favorite is in veggie soup. So if you are looking for a simple to grow crop that can grow pretty well 8 months out of the year in our location cabbage is your man. Just remember Bt is your friend in keeping down those little green cabbage worms. They make great chicken and duck treats as well if you want to pick them or just turn the ducks in to the patch. 

Blessings from The Holler

The Canned Quilter

Monday, May 13, 2013

Food Memories


Isn't it funny how memories of family and loved ones can be so closely tied to certain dishes. For me I can't smell sweet potatoes without thinking of my late father. When you walked in his workshop in the backyard it always smelled of sweet potatoes from the sweet potatoes he would stick in the small oven there to bake. I think of my mother many times when canning. As a young child I spent so many hours peeling vegetables, shelling beans or washing fruit while helping her can away the summer.

O Wise One has wonderful memories of his late father and asparagus. His father would come home for lunch and along the way stop the old tractor along the fields and fence lines and pick the wild asparagus growing there. Bearing that hand full of spears, his father would bring them home at lunch time for his wife to make creamed asparagus over toast.  A perfect lunch for the three of them.


For my asparagus in this recipe I am going to use asparagus ends. When you pick asparagus you trim the end nearest the soil off about an inch or two because the peeling can be woody. For me I do not throw away those ends or give them to the chickens but rather peel them for creamed asparagus during asparagus season. In the photo above you can see I slip a small sharp paring knife right under that outer skin and just peel it right off.
 

Then the peelings go to the chickens or pigs.


The interior fleshy part of the asparagus ends should be tender now that you have gotten rid of that hard exterior peel. These I throw into the microwave in a little water and cook for about 3 minutes or until soft.


Next I melt about 3/4 stick butter in a skillet.


Now add 1/2 cup flour and stir to combine.


 On low heat cook this butter flour mixture for about 5 minutes stirring constantly. You want to cook the flour but not brown it.
 

Once your flour has cooked you gradually add small amounts of milk or cream, pour it slowly while stirring with a whisk to incorporate and work out any lumps continue cooking and adding milk. Your flour milk mixture will begin to thicken as it simmers.
 

And there you have the beginnings of a basic cream sauce. 


In this picture you can see my sauce gently simmering around the edges of the pan. (Do Not Boil) Now with your whisk incorporate you seasonings. In ours I added sea salt, freshly ground pepper, a little onion powder and garlic powder. 
 
 Then I added my cup of drained cooked asparagus ends from the microwave and threw in a pint of canned drained asparagus pieces from the pantry. Stir well to combine.


Continue to simmer until the asparagus has warmed through and there you have it creamed asparagus or cream of asparagus soup if it were a little thinner!


Next I toasted some whole wheat toast and tore it into small pieces. 
 

And there you have it creamed asparagus over toast. And you also have a way to use up those asparagus ends that would normally be thrown away.

Do you have a special dish that reminds you of a loved one?

Blessings from The Holler

The Canned Quilter 


Thursday, October 25, 2012

Fall Turnips


What's in my garden right now? Turnips : )


We are loving those fresh turnip greens with just a touch of bacon for flavor and chopped onions and a small turnip chopped into it.


For those who haven't tried it here is my recipe for Scalloped Turnips.


What is your favorite way to eat turnips?

Blessings from The Holler

The Canned Quilter

Wednesday, October 10, 2012

The Bounty Of Frost


It seems as if every weather pattern of the season bring some sort of bounty when you know where to look and how to prepare it. Here at Hickery Holler is no different. The early spring rains and warmer weather bring the mushrooms. The first frost and cooler weather bring the walnuts and pecans. And every year about October the frost returns. We work frantically to harvest any remaining warm weather crops that have languished in the gardens such as the tomatoes and peppers.  


The green tomatoes are brought into the house to ripen and eat as the last delicacies of summer. But every year for a short length of time we enjoy the delights of a good plate or two of fried green tomatoes. Not a dish we eat every day but a nice change from the standard ways that we consume the tomato harvest. Sometimes I will can tomato relish or make green tomato mincemeat pie filling but since I still have some left over from last year that I canned I will instead concentrate on canning pumpkin, squash and sweet potatoes this fall for pies. So we brought in only a small amount of tomatoes and will feed the remaining to the pigs.   


I slice my tomatoes and simply dip them in a wash of milk and egg and then flour. Then dip them again in the milk wash and then flour again.


Then dropped into a cast iron skillet with a little oil of choice and allowed to brown on both sides. 


 Once browned they are removed from the skillet and allowed to cool and drain on paper towels and served warm with a side of homemade tomato ketchup. 


And on this day served with some breaded pork tenderloin sandwiches. And if you don't want to fry them they can be rolled in cracker crumbs and baked in the oven. But today we fried these as a treat for supper on a cold and windy October evening.  

Blessings from The Holler

The Canned Quilter

Thursday, June 7, 2012

Cream Peas And New Potatoes


Recently I did a post on seasonal eating and one of the dishes I showed was creamed peas and new potatoes. I received several requests for a post on making this dish. Creamed peas is a dish that is looked forward to in my family with almost as much anticipation as that first vine ripened tomato. Peas usually always start producing about the same time as the potatoes start to produce small potatoes. Harvesting those new potatoes is as easy as pulling the soil or straw away from that potato stem and finding the very young small potatoes.  

When eating seasonally the meals are about firsts. That first fresh lettuce salad after a long winter with no fresh greens. Those first crisp and succulent asparagus spears thrown on the grill. That first ear of fresh corn, or ripe tomato.  For many the sweet fresh taste of those peas is such a treat. It just makes sense to pair it with the smooth taste of the new potatoes stolen from under those still producing vines. 


Rinse potatoes to remove any soil. I used 4 medium sized new potatoes with 2 cups of fresh peas. 


Because the peeling is immature you should be able to simply scrape off the peeling with the edge of a sharp knife or scrub it off with a scrub brush or pad.


I then chopped my potatoes into 1 inch pieces and added about 2 cups of fresh peas. Cover with water and bring to a boil and boil until potatoes are soft and cooked through. 


Drain.


Return to pot and add 1/2 stick of butter. Return to flame and melt butter and get hot.


Now add 4 Tablespoons flour to a measuring cup and add enough milk or cream to make a thin paste. Stir well to remove lumps.


Add your flour paste to hot peas and butter mixture and stir well. Continue to stir and cook on low until it thickens well. Then add additional milk or cream until you get a thick and creamy consistency.


Add salt and pepper to taste. My father also loved pearl onions in with his potatoes and peas. 


I spent an afternoon in the kitchen canning chicken broth, shelling peas and making dinner. I served my potatoes and peas with homegrown ham steaks and fresh broccoli. 

I hope this helps any of you wanting to make this traditional spring dish.
Want something a little different throw in the pot a little diced garlic chives...better yet some mint.


 Hoping every meal is fresh and homegrown!


 Blessings from The Holler

The Canned Quilter 

Wednesday, October 26, 2011

Oven Frying Green Tomatoes


Most farms and farmers markets now have green tomatoes on hand. With winter fast approaching most of us on the farm have more green tomatoes than we want. I felt that now was the time to again repost about oven frying green tomatoes. If you are like me I fry very little these days. I now cook fish, okra, breaded squash and green tomatoes in the oven. My squash, okra and green tomatoes I actually bread and freeze in my Foodsaver bags to take out during the winter.Yes it is possible to have crisp oven fried food without the spatter and mess.

Thursday, August 4, 2011

Scalloped Corn


They don't call this comfort food for nothing !


Scalloped Corn

2 cups corn
2 eggs
1 1/2 cups milk or half and half
1/2 cup celery
1/4 cup finely chopped onion
1 tsp salt
2 Tbsp melted butter
1/4 tsp paprika
1 cup cracker crumbs
2/3 cup diced cheese

Mix all ingredients and pour into buttered casserole dish. Bake 1 hour at 350. Cool for 10 minutes before serving.


Blessings from The Holler

The Canned Quilter

Monday, December 6, 2010

Our Favorite Cabbage Dinner


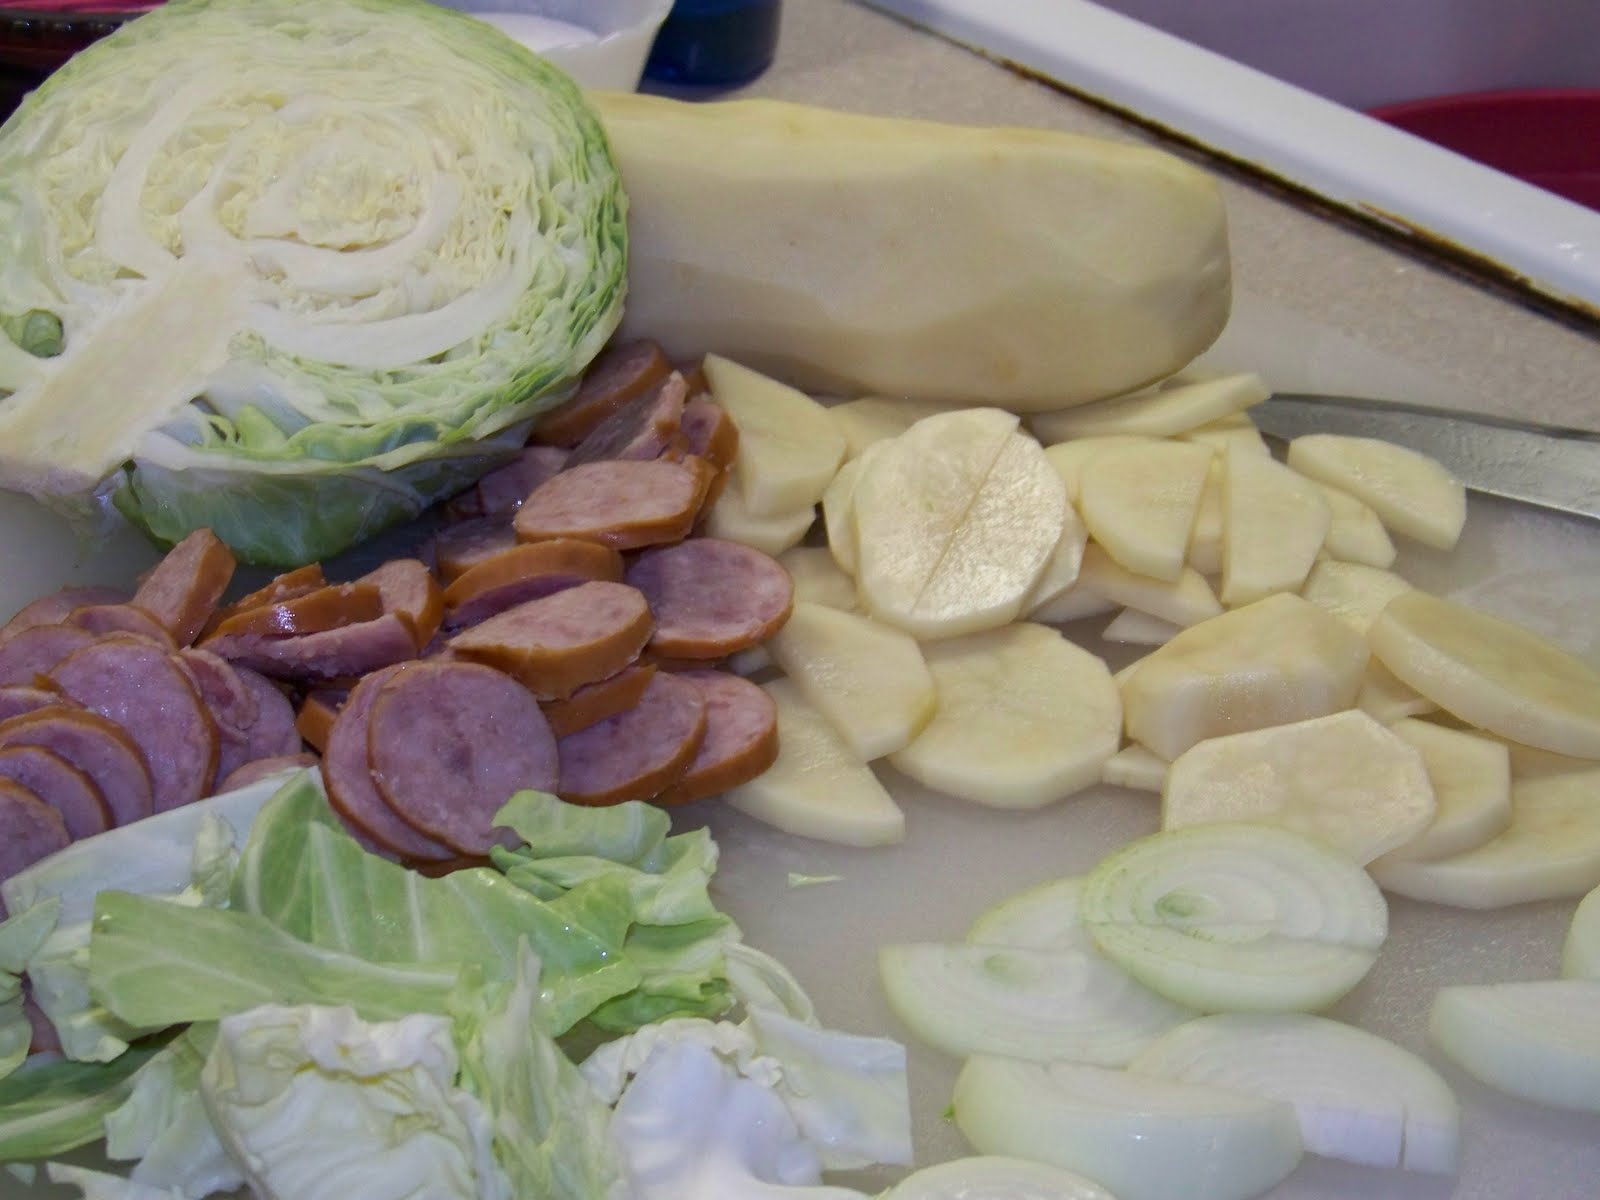
Since I was spending the weekend quilting I wanted something easy to throw into the crockpot for the family to eat on this weekend. I knew that everyone had busy things to do and would come home wanting hot food after being out in the cold. During a recent trip to town our local grocer had cabbage for 49 cents a pound. So far 98 cents I got a nice head of cabbage and had my dinner dilemma answered. The cabbage was cut into bite size pieces. The onions sliced and a pound of polska kielbasa sliced.  Then 2 large potatoes were peeled and sliced. Starting and ending with cabbage they were layered in a large crockpot with a little salt and peppered and cooked on low for about 4 hours. 


One 2 pound head of cabbage, 2 large potatoes, one large onion and a pound of kielbasa completely filled my large crockpot. I knew that this would be enough to feed everyone all weekend.


Dinner consisted of our cabbage and potatoes and kielbasa served with crusty bread and a pumpkin pie for dessert. We ate on the leftovers all weekend allowing me to quilt and not have to keep getting up to cook.

I love quick crockpot meals like this especially during the winter. I love coming home from a busy day to the aroma of your meal already cooked and ready.

Anyone else out there got a great crockpot meal?

Blessings from The Holler

The Canned Quilter

Tuesday, November 2, 2010

Scalloped Turnips


With our first freeze a few days ago the turnip greens are gone. Turnip greens with a little bacon or ham are great along side a thick slab of buttermilk cornbread. So now we are down to the turnip roots themselves. I know alot of people don't like turnips because of the "bite" or that little tang that they all have. It helps if you pick younger turnips before they get hard and strong and woody. The big ones go to the chickens and pigs! I am also going to show you a trick to cooking turnips without that bite. Most people that don't even like turnips like this recipe!

SCALLOPED TURNIPS

Turnips washed, peeled and cubed into 1 inch cubed.(enough cubed turnips for an 8 inch or 2 quart casserole to be filled within 1 inch of the top)


Put turnips in a kettle (pot) of cold water and 1/2 tsp of baking soda.


Cook on medium heat just until they start to boil. At this point they will foam!!!!! They will not be soft.

The baking soda and heat helps to draw out the bitter "bite" of the turnips and mellow the taste.  Remove from heat.


Wash thoroughly and drain well. Put turnips back in pot and cover with cold salted water. Cook until almost tender. Drain.

Put turnips into buttered casserole.

Combine in separate bowl:
1/4 cup sugar
3 heaping Tbsp flour
1 pint Half & Half

Stir well


Pour milk mixture over turnips in casserole. Dot with butter.

Bake in a 325 oven for  about 1 hour.

This make a smooth and creamy scalloped turnip dish. Sometimes I will throw just a handfull of grated cheese in there just because Baby O likes it that way. 


PS: If you are canning turnips cooking them like this in baking soda before putting into jars will greatly mellow the taste of them.. (making sure to rinse well before jarring) 


Blessings from The Holler

The Canned Quilter
Related Posts with Thumbnails